 |
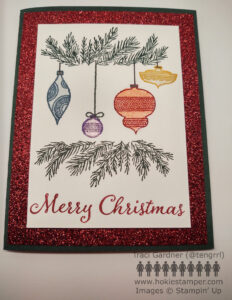
This card came about from a series of mistakes, but it came out looking as though I planned it. I stamped the images on the white cardstock, planning to place the stamped layer on the Evening Evergreen cardstock base. When I got to that point, it looked so very flat and boring. I couldn’t think of any embellishments that would help. There isn’t a good place for sequins or rhinestones.
So problem-solving began. My beginning to challenges is to do something else and then come back to the card. I decided to organize my foil and glimmer papers. In the process I found an unopened pack of retired glimmer paper that included the beautiful sheet in Merry Merlot. It was close enough to the Cherry Cobbler to work.
Still, the card needed a little more. I grabbed my old stand-by: Wink of Stella. I started adding it to the white spaces on the ornaments. When I got to the Cherry Cobbler ornament, the color bleed from the ink into the white areas. I thought the card was ruined for sure. Fortunately I watched part of Tim Holtz’s Holiday 2021 Demo: Part 3 video last night, and I remembered the smudging technique. I wondered, “What if I try to make it look like the color is bleeding on purpose?” Lo and behold! It worked. The color on all the ornaments softly blended out with the Wink of Stella pen, and I have a card I like!
| Stamp | Evergreen Elegance (#153313) Stars Are Shining (#156345) |
| Cardstock |
Basic White (#159276) |
| Ink |
Evening Evergreen (#155576) Misty Moonlight (#153118) Gorgeous Grape (#147099) Cherry Cobbler (#147083) Bumblebee (#153116) Basic Gray (#149165) #2 Pencil (to color the ornament tops silver) Wink of Stella Glitter Brush (#141897) |
| Adhesive | Stampin’ Seal (#152813) Stampin’ Dimensionals (#104430) |